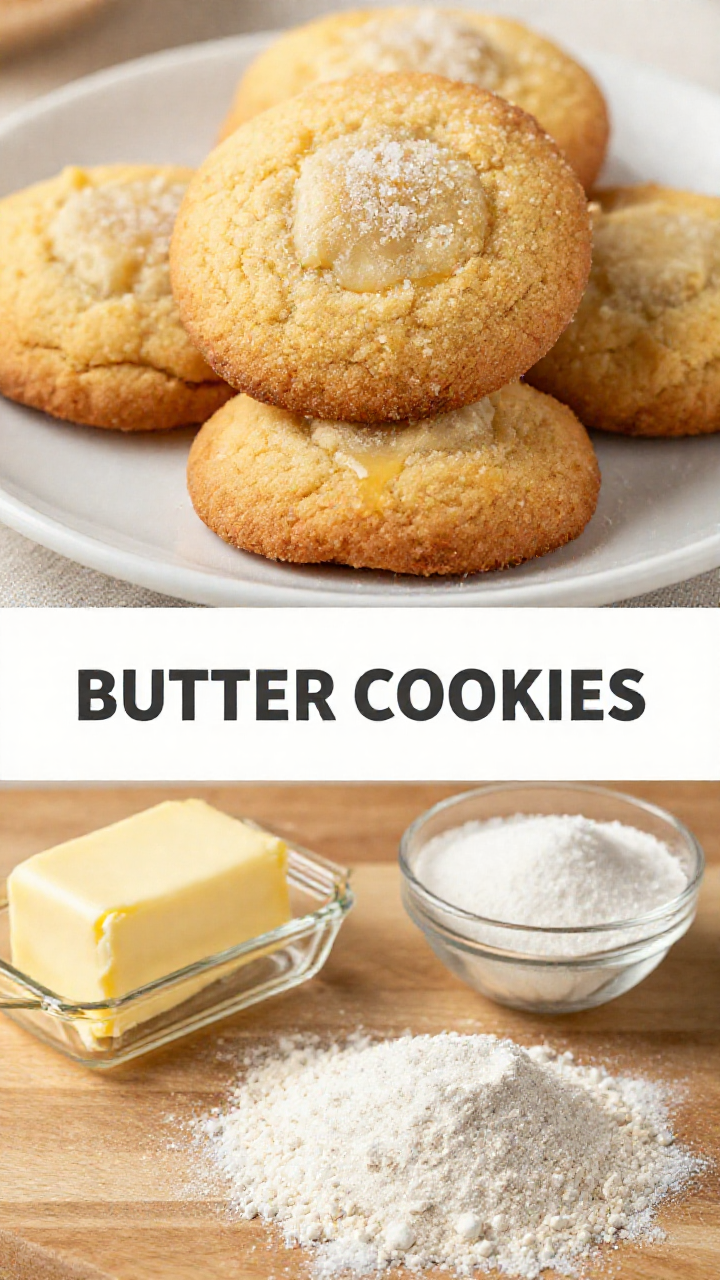
3 Ingredient Butter Cookies: A Love Story in Every Bite
Hello, darlings! Norra here, your resident baker and hostess with the mostest. Today, I’m absolutely thrilled to share a recipe that’s near and dear to my heart – my incredibly simple, yet utterly divine, 3 Ingredient Butter Cookies. Yes, you read that right – just THREE ingredients! It’s a recipe that’s perfect for those moments when you crave something sweet, wholesome, and utterly comforting, without spending hours in the kitchen. These cookies are so dreamy, they practically melt in your mouth. Zakaria, my beloved hubby, absolutely adores them, and I know your family will too!
Baking has always been my way of showing love. There’s something so magical about transforming simple ingredients into something beautiful and delicious. And these butter cookies? They are the epitome of that magic. They are perfect with a cup of tea, a glass of milk, or even enjoyed on their own. They are the perfect treat for any occasion, big or small. I hope you give them a try.
Why You’ll Absolutely Love This Recipe
Oh, my dears, where do I even begin? These cookies aren’t just easy; they’re an experience. They’re a testament to the fact that sometimes, the simplest things in life are the most beautiful.
- Minimal Effort, Maximum Flavor: Seriously, three ingredients! It doesn’t get easier than this. Even Zakaria can whip these up (though I usually handle the presentation!).
- Wholesome Goodness: These cookies are made with real butter, so you know exactly what you’re feeding your family. No mysterious additives here!
- Perfect for Any Occasion: From a simple afternoon treat to a delightful addition to a dessert platter, these cookies are always a hit.
- Customizable: Want to add a touch of almond extract? Or maybe some sprinkles? The possibilities are endless! I sometimes drizzle them with a bit of melted chocolate for an extra touch of elegance.
- Hubby’s Favorite: Need I say more? Zakaria can’t resist these. They disappear in minutes!
And let me tell you, the satisfaction of seeing your loved ones enjoy something you’ve made with your own two hands is simply priceless. Thank you for letting me share this little piece of my heart with you.
The Magic Trio: Ingredients You’ll Need
Here’s what you’ll need to create these little bites of heaven:
- 1 cup butter (softened – SEE NOTE 1): The star of the show! Make sure it’s softened, but not melted. I prefer using unsalted butter so I can control the saltiness.
- ½ cup sugar: Granulated sugar works best for that classic butter cookie texture. You can experiment with powdered sugar for a slightly different result.
- 2 cups cake / all-purpose flour (SEE NOTE 2): Cake flour will give you a more tender cookie, but all-purpose works just fine in a pinch. I always sift my flour to ensure there are no lumps.
NOTE 1: Softened butter is key! It should be soft enough to easily press your finger into, but not greasy or melted. If you forget to take it out of the fridge ahead of time, you can try microwaving it for a few seconds at a time, but be careful not to melt it. The butter is very important for the recipe, and the cookies.
NOTE 2: I usually use cake flour because it makes these cookies extra tender and delicate. However, if you only have all-purpose flour on hand, that’s perfectly fine too! Just make sure to measure it correctly – spoon it into your measuring cup and level it off with a knife. That way, you can avoid adding too much flour, which can make the cookies dry.
Step-by-Step: Baking Your Way to Bliss
Now for the fun part! Follow these simple steps, and you’ll be enjoying warm, buttery cookies in no time.
- Cream the Butter and Sugar: In a large bowl, beat the softened butter and sugar together for about 5 minutes until the mixture is pale, light, and fluffy. This is where a stand mixer comes in handy, but a hand mixer works just as well. The key is to really incorporate the air into the mixture, which will result in a lighter, more tender cookie.
- Incorporate the Flour: Sift the flour into the beaten butter mixture. This helps prevent lumps and ensures that the flour is evenly distributed. Mix gently to combine, forming a soft dough. Be careful not to overmix, as this can develop the gluten in the flour and make the cookies tough.
- Chill the Dough: Wrap the dough in clear wrap and refrigerate for at least 30 minutes. This step is crucial, as it allows the gluten to relax and the butter to firm up, which will prevent the cookies from spreading too much in the oven. If you skip this step, your cookies might end up flat and greasy.
- Roll and Cut: Remove the dough from the refrigerator and turn it out onto a lightly floured surface. Roll it out to about 1/4 inch (6mm) thick. Adjust your baking time accordingly – thinner cookies will bake faster, while thicker cookies will need more time. Cut into any shape you prefer! I love using heart-shaped cookie cutters for a touch of romance, but you can use any shape you like.
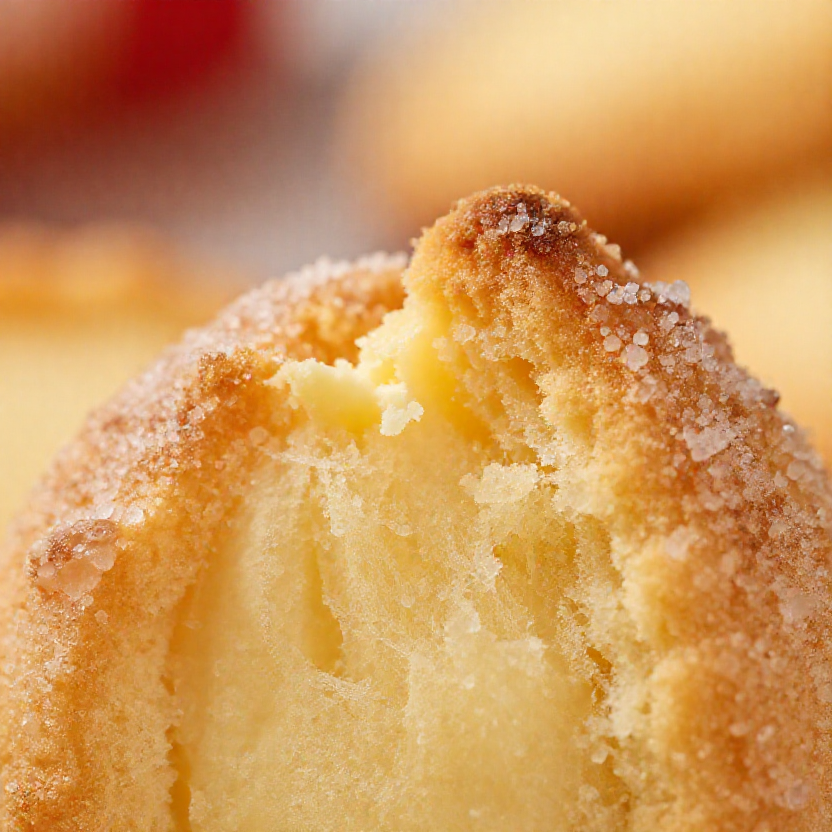
- Bake to Golden Perfection: Place the cutout shapes onto a baking sheet lined with parchment paper. Bake for 12 to 15 minutes in a preheated oven of 320°F (160°C) until golden brown. Keep a close eye on them, as they can burn easily. Once they’re done, remove them from the oven and let them cool on the baking sheet for a few minutes before transferring them to a wire rack to cool completely.
And there you have it! Beautiful, buttery cookies that are sure to impress. These cookies are a great treat and I m happy to share the recipe with you.
Pro Tips for Cookie Perfection
Here are a few extra tips to ensure your cookies turn out perfectly every time:
- Use Room Temperature Butter: This is non-negotiable! Room temperature butter creams much better than cold butter, resulting in a lighter, more tender cookie.
- Don’t Overmix the Dough: Overmixing develops the gluten in the flour, which can make the cookies tough. Mix just until the ingredients are combined.
- Chill the Dough: As mentioned earlier, chilling the dough is crucial for preventing the cookies from spreading too much in the oven.
- Use Parchment Paper: Parchment paper prevents the cookies from sticking to the baking sheet and makes cleanup a breeze.
- Don’t Overbake: Overbaked cookies are dry and crumbly. Bake just until the edges are golden brown.
- Cool Completely: Let the cookies cool completely before storing them. This will prevent them from becoming soggy.
These little secrets are what separate good cookies from truly exceptional ones. Thank you for trusting me with your baking journey!
Common Mistakes to Avoid
Even with a simple recipe, there are a few common pitfalls to watch out for:
- Using Melted Butter: This will result in flat, greasy cookies.
- Overmeasuring the Flour: Too much flour will make the cookies dry and crumbly.
- Skipping the Chilling Step: This will cause the cookies to spread too much in the oven.
- Overbaking the Cookies: Overbaked cookies are dry and hard.
By avoiding these mistakes, you’ll be well on your way to baking perfect butter cookies every time.
Variations to Spice Things Up
While I adore the simplicity of the classic recipe, sometimes it’s fun to experiment! Here are a few variations to try:
- Almond Extract: Add a few drops of almond extract to the dough for a subtle nutty flavor.
- Vanilla Extract: A teaspoon of vanilla extract adds a touch of warmth and complexity.
- Citrus Zest: Lemon, orange, or lime zest adds a bright, refreshing flavor.
- Sprinkles: Add a sprinkle of colorful sprinkles before baking for a festive touch.
- Chocolate Chips: Fold in some mini chocolate chips for a chocolatey twist.
- Icing: Once cooled, drizzle the cookies with a simple glaze made from powdered sugar and milk.
Feel free to get creative and experiment with your own favorite flavors! The possibilities are endless. I hope you try some of these!
Storing Your Butter Cookie Treasures
To keep your cookies fresh and delicious, store them in an airtight container at room temperature for up to a week. You can also freeze them for up to two months. Just make sure to wrap them tightly in clear wrap before freezing.
Frequently Asked Questions (FAQ)
Here are some answers to common questions about this recipe:
- Can I use salted butter?: Yes, but you may want to reduce the amount of sugar slightly to compensate for the added salt.
- Can I use a different type of sugar?: You can experiment with powdered sugar or brown sugar, but the texture and flavor of the cookies will be slightly different.
- Can I make the dough ahead of time?: Yes, you can make the dough up to 24 hours in advance and store it in the refrigerator.
- Can I freeze the dough?: Yes, you can freeze the dough for up to two months. Just make sure to wrap it tightly in clear wrap before freezing.
- Why are my cookies spreading too much?: This could be due to using melted butter, not chilling the dough, or overmixing the dough.
- Why are my cookies dry?: This could be due to using too much flour or overbaking the cookies.
This helps answer some of the most common questions I get about the recipe. This helps answer your question about storing the cookies!
Serving Suggestions: A Touch of Elegance
These cookies are delightful on their own, but here are a few ways to elevate your serving presentation:
- Tea Time Treat: Serve with a pot of your favorite tea for a classic afternoon treat.
- Dessert Platter: Add to a dessert platter alongside other sweet treats for a beautiful and varied display.
- Gift Giving: Package in a pretty box or tin for a thoughtful homemade gift. Baked Goods That Mail Well, such as these cookies, make great gifts!
- Ice Cream Sandwiches: Use two cookies to sandwich a scoop of your favorite ice cream for a decadent treat.
- Dipped in Chocolate: Dip half of the cookie in melted chocolate and sprinkle with nuts or sprinkles for an elegant touch.
Remember, presentation is key! A little extra effort can make all the difference. I am sure you will find your own way to serve them.
Balancing Flavors: My Culinary Philosophy
As you all know, my darling Zakaria loves bold, spicy flavors. He’s the king of chili and the sultan of spice! But I, on the other hand, appreciate the delicate balance of flavors. I believe that food should be both delicious and beautiful. And that’s where these butter cookies come in. They’re a perfect complement to Zakaria’s fiery creations. They provide a soothing, comforting contrast that balances out the intensity.
It’s all about creating harmony in the kitchen and on the table. Zakaria brings the heat, and I bring the sweet. Together, we create culinary magic! This simple butter cookies recipe 3 ingredients is a perfect example of my style.
A Cookie for Every Occasion
These three ingredient butter cookies are so versatile, they’re perfect for any occasion. Need a quick and easy dessert for a weeknight dinner? These cookies are your answer. Hosting a fancy tea party? These cookies will add a touch of elegance to your table. Looking for a thoughtful homemade gift? These cookies are sure to impress.
They’re also great for: Personal Size Desserts. Their diminutive size makes them perfect for a quick treat!
The Dough: A Blank Canvas
The dough for these cookies is incredibly versatile. You can add different extracts, spices, or even food coloring to create a variety of flavors and colors. It’s like a blank canvas waiting to be transformed into a work of art.
You can also use different cookie cutters to create different shapes. Get creative and have fun with it! If you want, you can also try to make 4 ingredient butter cookies by adding a bit of vanilla extract to the dough.
Baking Time: A Matter of Precision
Baking time is crucial when making these cookies. You want them to be golden brown around the edges, but still soft in the center. Keep a close eye on them and adjust the baking time as needed. Remember, thinner cookies will bake faster than thicker cookies.
If you overbake them, they’ll be dry and crumbly. If you underbake them, they’ll be doughy and undercooked. It’s all about finding that perfect balance. Happy baking hi!
Easy and Delicious: My Promise to You
My goal is to share recipes that are both easy and delicious. I want to empower you to create beautiful and wholesome meals for your loved ones, without spending hours in the kitchen. And these 3 ingredient butter cookies easy are a perfect example of that.
I promise you, this recipe is foolproof. Even if you’re a beginner baker, you can make these cookies with confidence. So go ahead, give it a try! I know you’ll love them.
A Final Word of Love
Thank you again for joining me in my kitchen. I hope you enjoy this recipe as much as my family and I do. Remember, baking is about more than just following a recipe. It’s about creating memories, sharing love, and nourishing the souls of those around you. So go forth and bake with love!
And if you make these cookies, be sure to share your creations with me on social media. I can’t wait to see what you come up with!
If you’re looking for other delicious cookie recipes, check out my apple-cookies and almond-pastry-cookies recipes!
I also think these would be great for Easy Cupcake Recipes 3 Ingredients. You could use a cupcake pan for baking.
And finally, before baking, be sure to preheat your oven!
I hope this helps! This helps answer your question! Answer your question and enjoy!
Happy baking, my dears!

3 ingredient Butter Cookies
Ingredients
Method
- Beat butter and sugar until light and fluffy.
- Sift in flour and mix gently to form a soft dough.
- Wrap and refrigerate dough for 30 minutes.
- Roll out dough to 1/4 inch thick and cut into shapes.
- Bake at 320°F (160°C) for 12-15 minutes until golden brown.
Notes